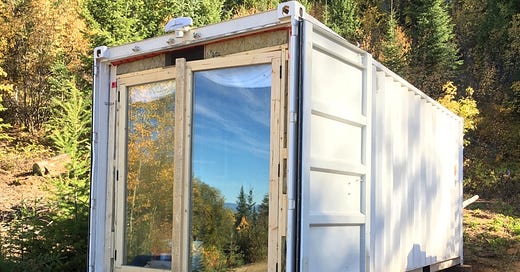
There is no level ground anywhere on the property, so the first step was making an area flat and fairly level. Next was moving the can into place using the Toyota, then jacking up each corner and placing it onto these rounds. The rounds will rot but with time ticking before the snow the house needed to get level. They’ll be replaced in the near future.
Using a sea can as a living space has unique challenges. It’s less than 130 square feet.
Framing the front and inside was like normal for the most part. The front doors are a repurposed sliding glass door, made to swing out like massive french doors. It turned out to fit the opening of the sea can beautifully and I get to watch some incredible sunsets from my bed.
I insulated with rock wool. There’s a plant that makes it nearby, and it’s mold resistant which made it the best choice for this. Shipping container homes struggle with moisture. They’re so well sealed that even if they’re well vapour barriered, moisture collects between the metal exterior and the insulation causing rot. I’ve done my best to prevent it, but eventually I’ll take apart a wall and see how it’s managed.
Don’t get me started on spray foam, just don’t.
The floor in my container is made out of very hard and durable mahogany plywood (fancy, right?) So, cutting through for air vents was a careful but necessary process. The steel walls are 3/32 of and inch thick. It doesn't sound like much but when it comes to steel that’s pretty darn thick. Cutting the hole for the stove pipe to go through was a process as well. Putting it through the wall instead of the roof helps to prevent leaking and keep a bit more warmth in the house.
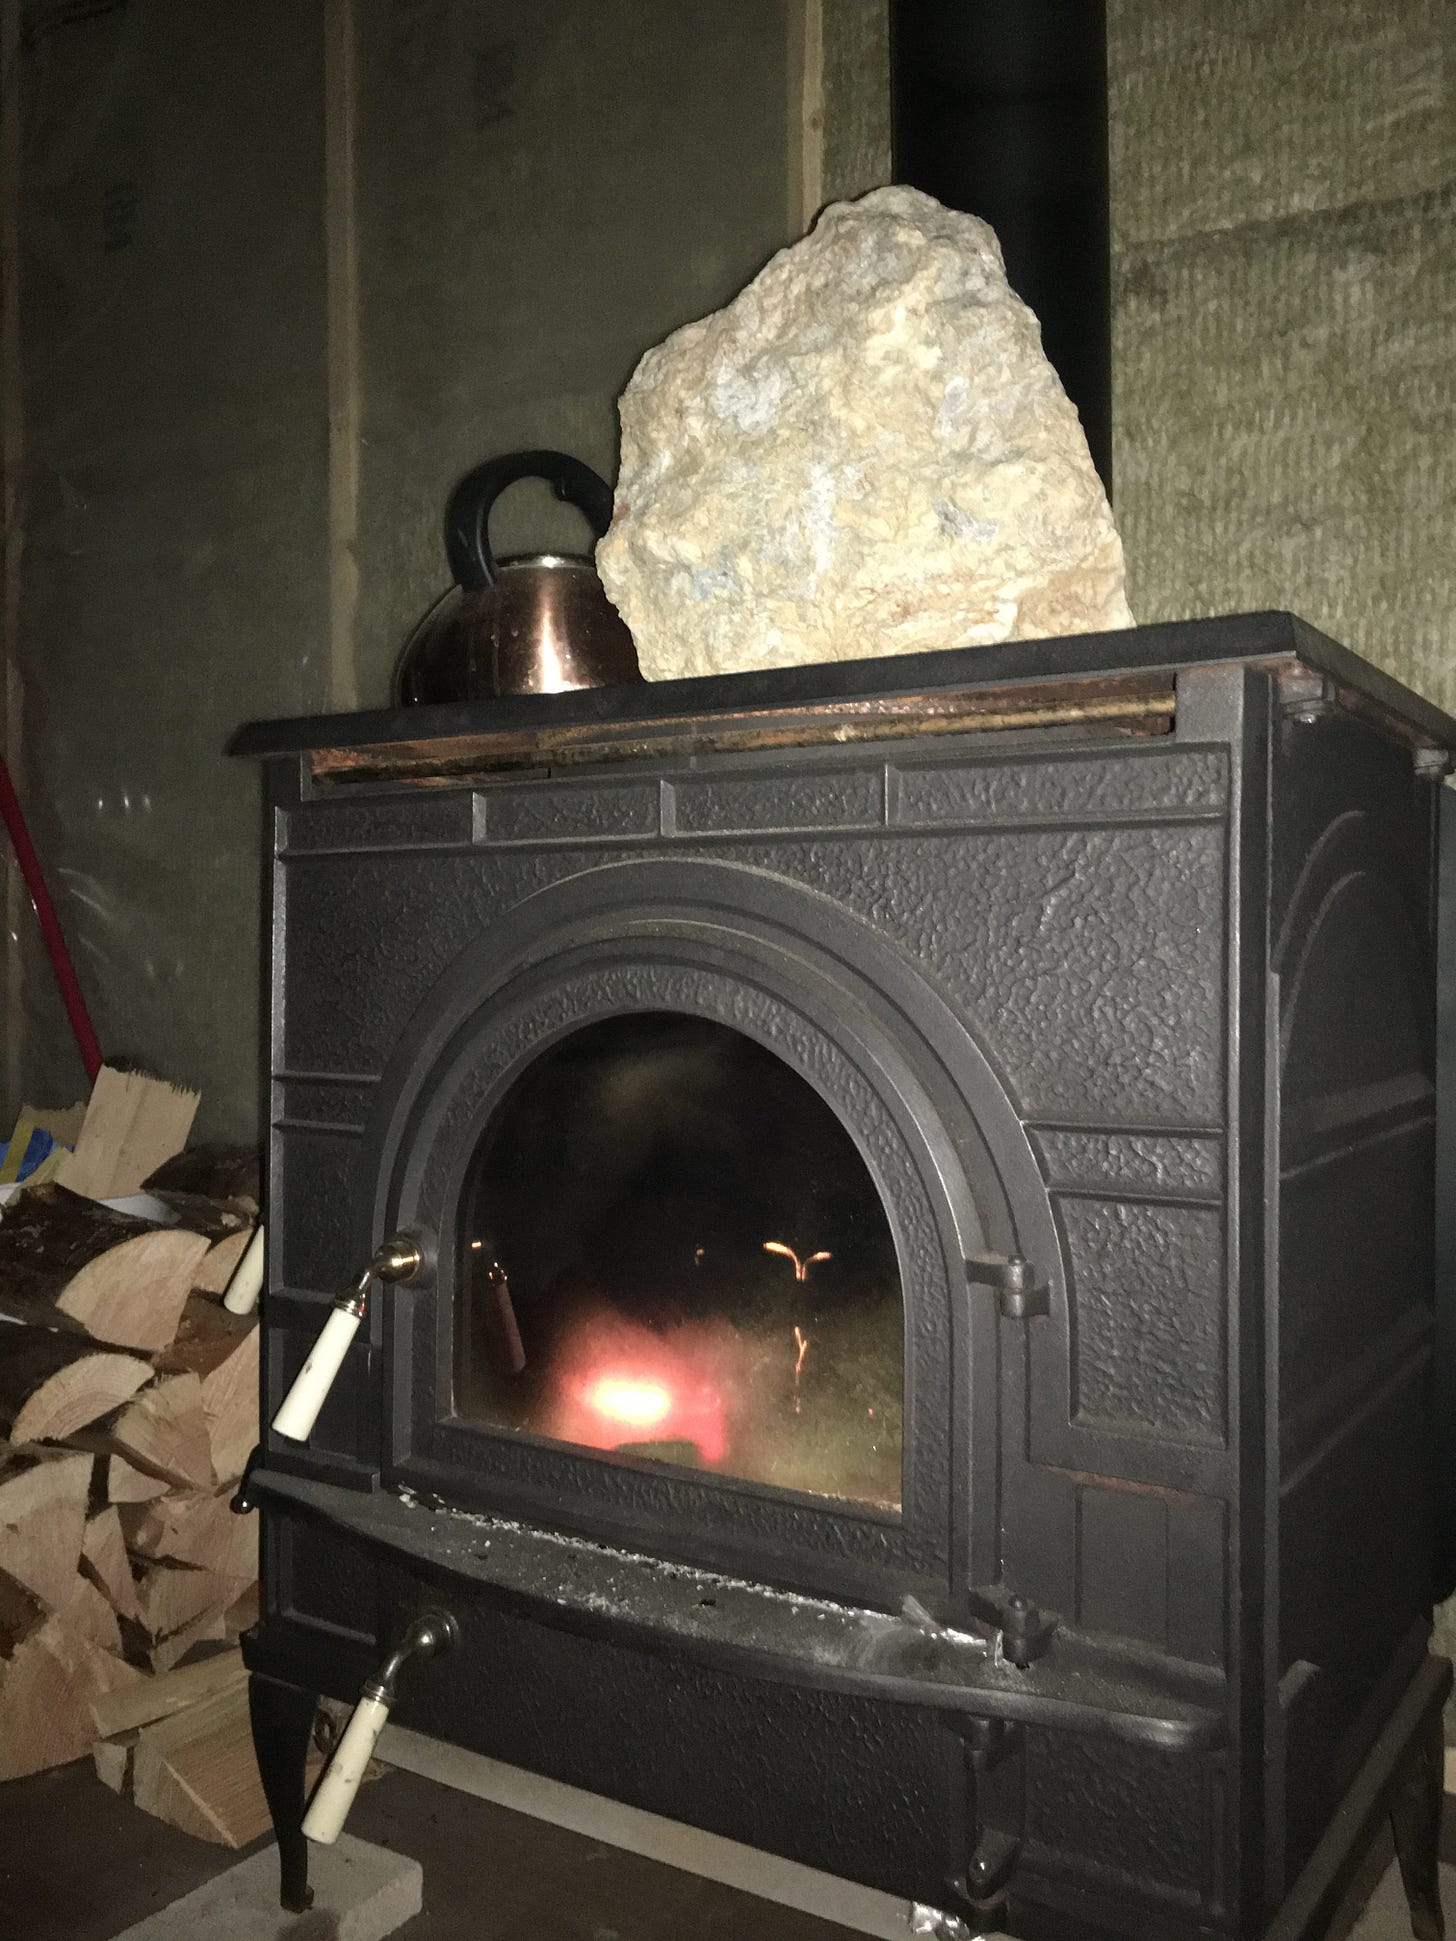
I found the wood stove at the end of a driveway. SCORE!
I was on vacation on Bowen island. There it was, just sitting there. I didn’t know exactly what I was going to use the stove for at the time - It’d been rained on and looked rusty and awful. Weighs a mere 350 pounds, but I had to have it. I think It polished up pretty nice. Behind it you can see the rock wool and framing before the interior walls went in.
The big rock on the stove was a biomass experiment, It worked!
I lived in the rock wool and vapour barrier for a couple of weeks until the interior panels were milled and dried. The pieces for the kitchen counter were milled too. We used Balsam Fir, a mistake. You wouldn’t think that different coniferous trees could be so varying, but Balsam Fir has a weird smell. Like wet dog. I try not to be fussy about things like that. But the tree stinks.
I slept on my mattress on the floor for a month. On the mattress, on some cardboard to help keep it clean. It didn’t seem like an issue at all until I moved the mattress to sweep. MOLD. The bottom of my mattress had begun to mold?! So, as things tend to happen, the next priority presented itself. Time to make a bed.
But not any bed. This bed will flip up to make more living space.
So, that means it’s time to find another tree to mill before the snow flies! We like to take ‘standing dead’. Trees that have died, but are still standing which has allowed them to dry a fair bit. Both to save time and ethically it feels better to not kill a tree if I don’t have to.
This takes TIME.
Bed up
It’s one thing to go buy lumber you need, bring it home and make the thing. But finding the tree, felling it, dragging it home, milling it, THEN making the thing?! That takes way more time. So, eventually the frame of the bed is made, the slats put in, and it was worth the all of the work. We now have both a mattress that isn’t rotting and a sitting space plus storage.
Bed Down
You can tell which kind of wood smells like dog by the colour. The white one, dog. The more pink one is Douglas Fir which smells like Christmas.
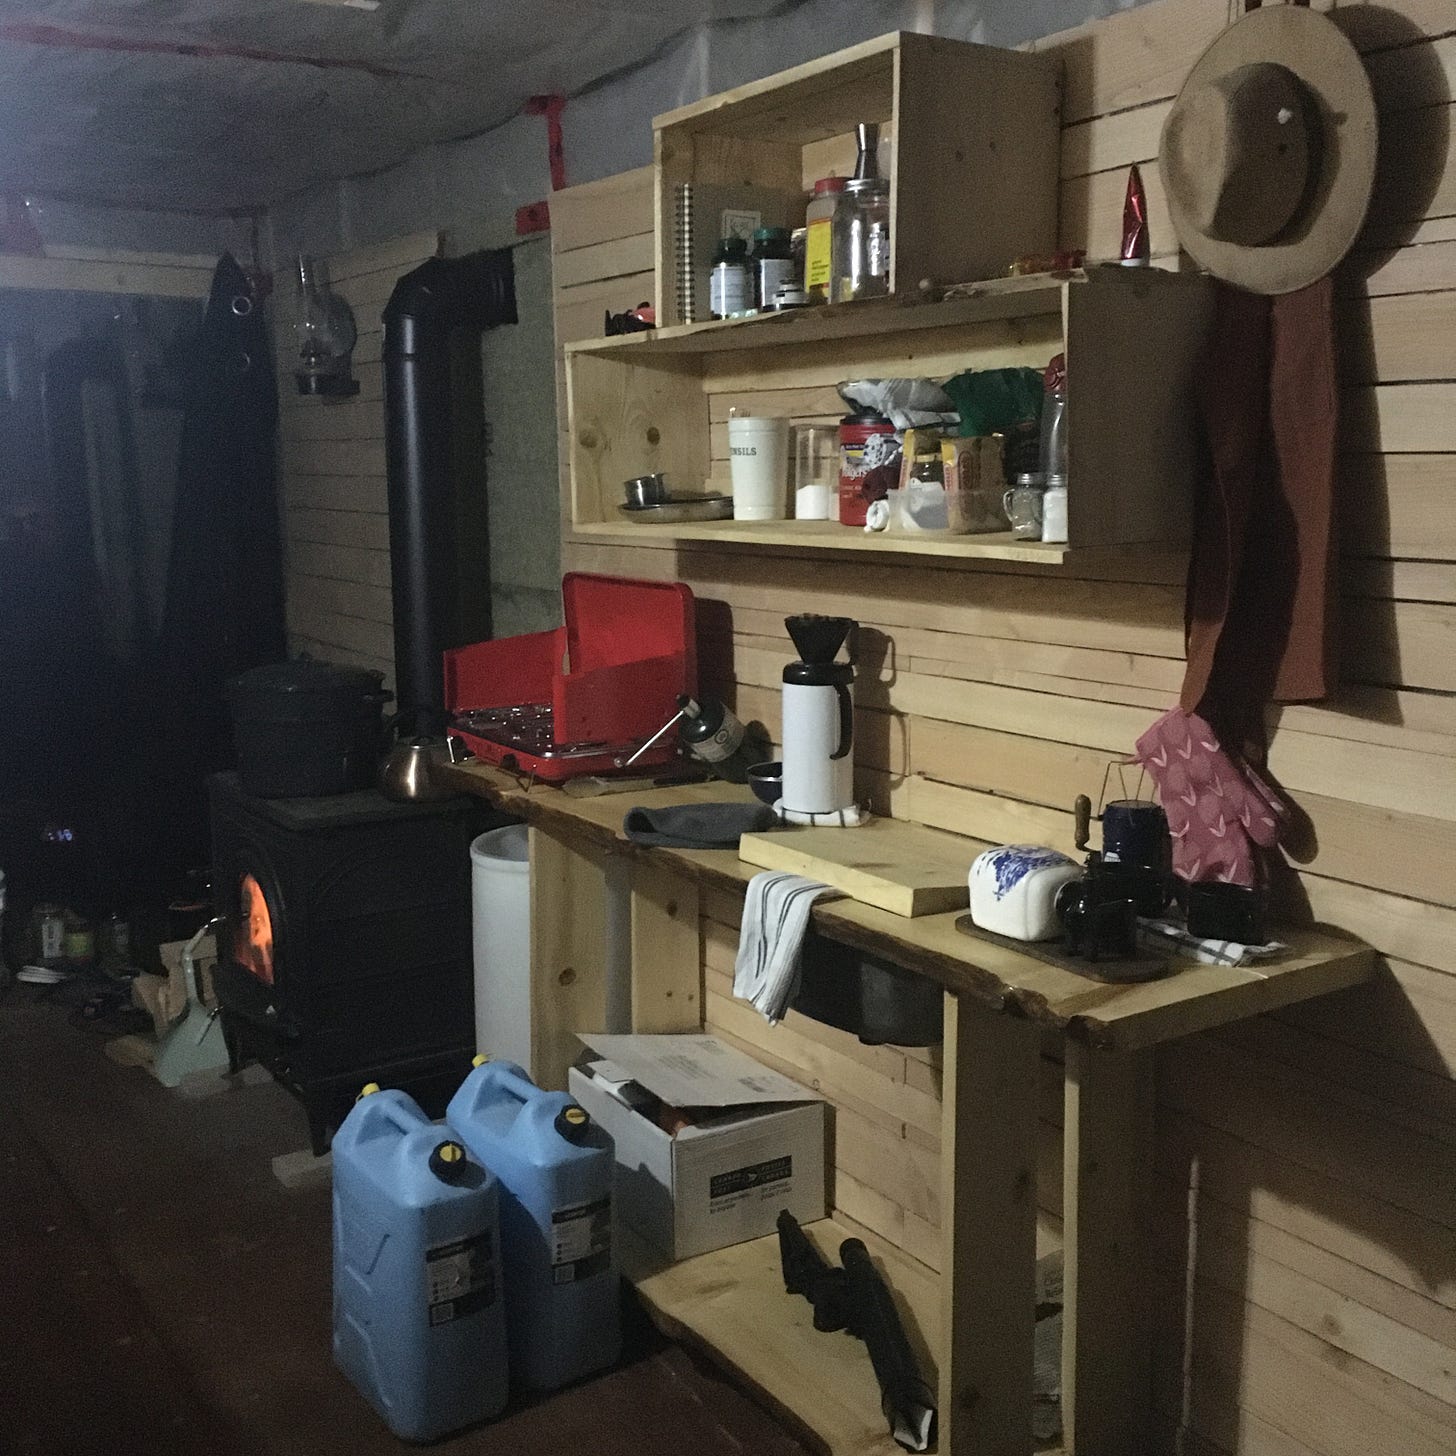
On to the kitchen. The sink is a double sink cut in half and turned sideways to save space. The clean water is kept in a container next to it, with a 12V fish tank pump submerged. The water is plumbed through copper pipe. So, maybe that counts as running water? Unsure. Last winter the sink emptied into a bucket which had to be taken out and dumped. It’s since been plumbed outside and I hope that I NEVER have to do that again.
The countertop is a thick piece of Balsam Fir. Cupboards are simple, since the idea is to be fairly minimal. I’ve lived the last two years cooking on a two burner propane camp stove. And you know what? I LOVE IT. I don’t think I could go back to electric. Even on a little inexpensive camp stove, the even cook and temperature of propane is way better than some dumb electric range. The next time you burn or undercook something on electric, don’t blame yourself. Blame the stove. Seriously.
In the above picture you can see that the interior panels behind the kitchen are in. It’s starting to feel like a real little house! After this, the rest went in including the ceiling panels. As the snow began to fly it made it hard to drag home wood for milling, so - for the rest of winter it is considered complete!
It does not have a shower inside. Why? With humidity being such an issue for sea can homes, it seems more worthwhile to make a shower outside of the house. That way the shower can be more spacious!
It also does not have a bathroom. Having a toilet of any kind in 120ish square feet seems pretty unpleasant to me. If it’s a composting type toilet, you’re within 15 feet of the thing AT ALL TIMES. I know they don’t smell or whatever, but. No. Plumbing a flushing toilet out of the house involves a lot of water consumption, and can fail. It makes things complicated. The trusty outhouse is the simplest and most convenient way for me. Dig a deep hole with your tractor, move your outhouse over it. Simple and pretty much foolproof.
Thanks for reading! Your feedback is always welcome and please make sure to subscribe to get updates straight to your inbox!


I've got a few of these on my property. Buried one in ground cut out top to add stairs put another about half way on top. I use it for a cellar. The one on top I put skylights in it. Lots of wildlife here. A lot of black bears and deer
I just found your newsletter...100% subscribing!