


My Solar Dehydrator DIY
Simply Made - From the Junk Pile

My mum has an easy way to make kale chips. She simply puts oiled, seasoned fresh kale onto a baking sheet and leaves it on the dash of her truck. Genius! I tried doing the same however mice got to it and made a mess of my truck.
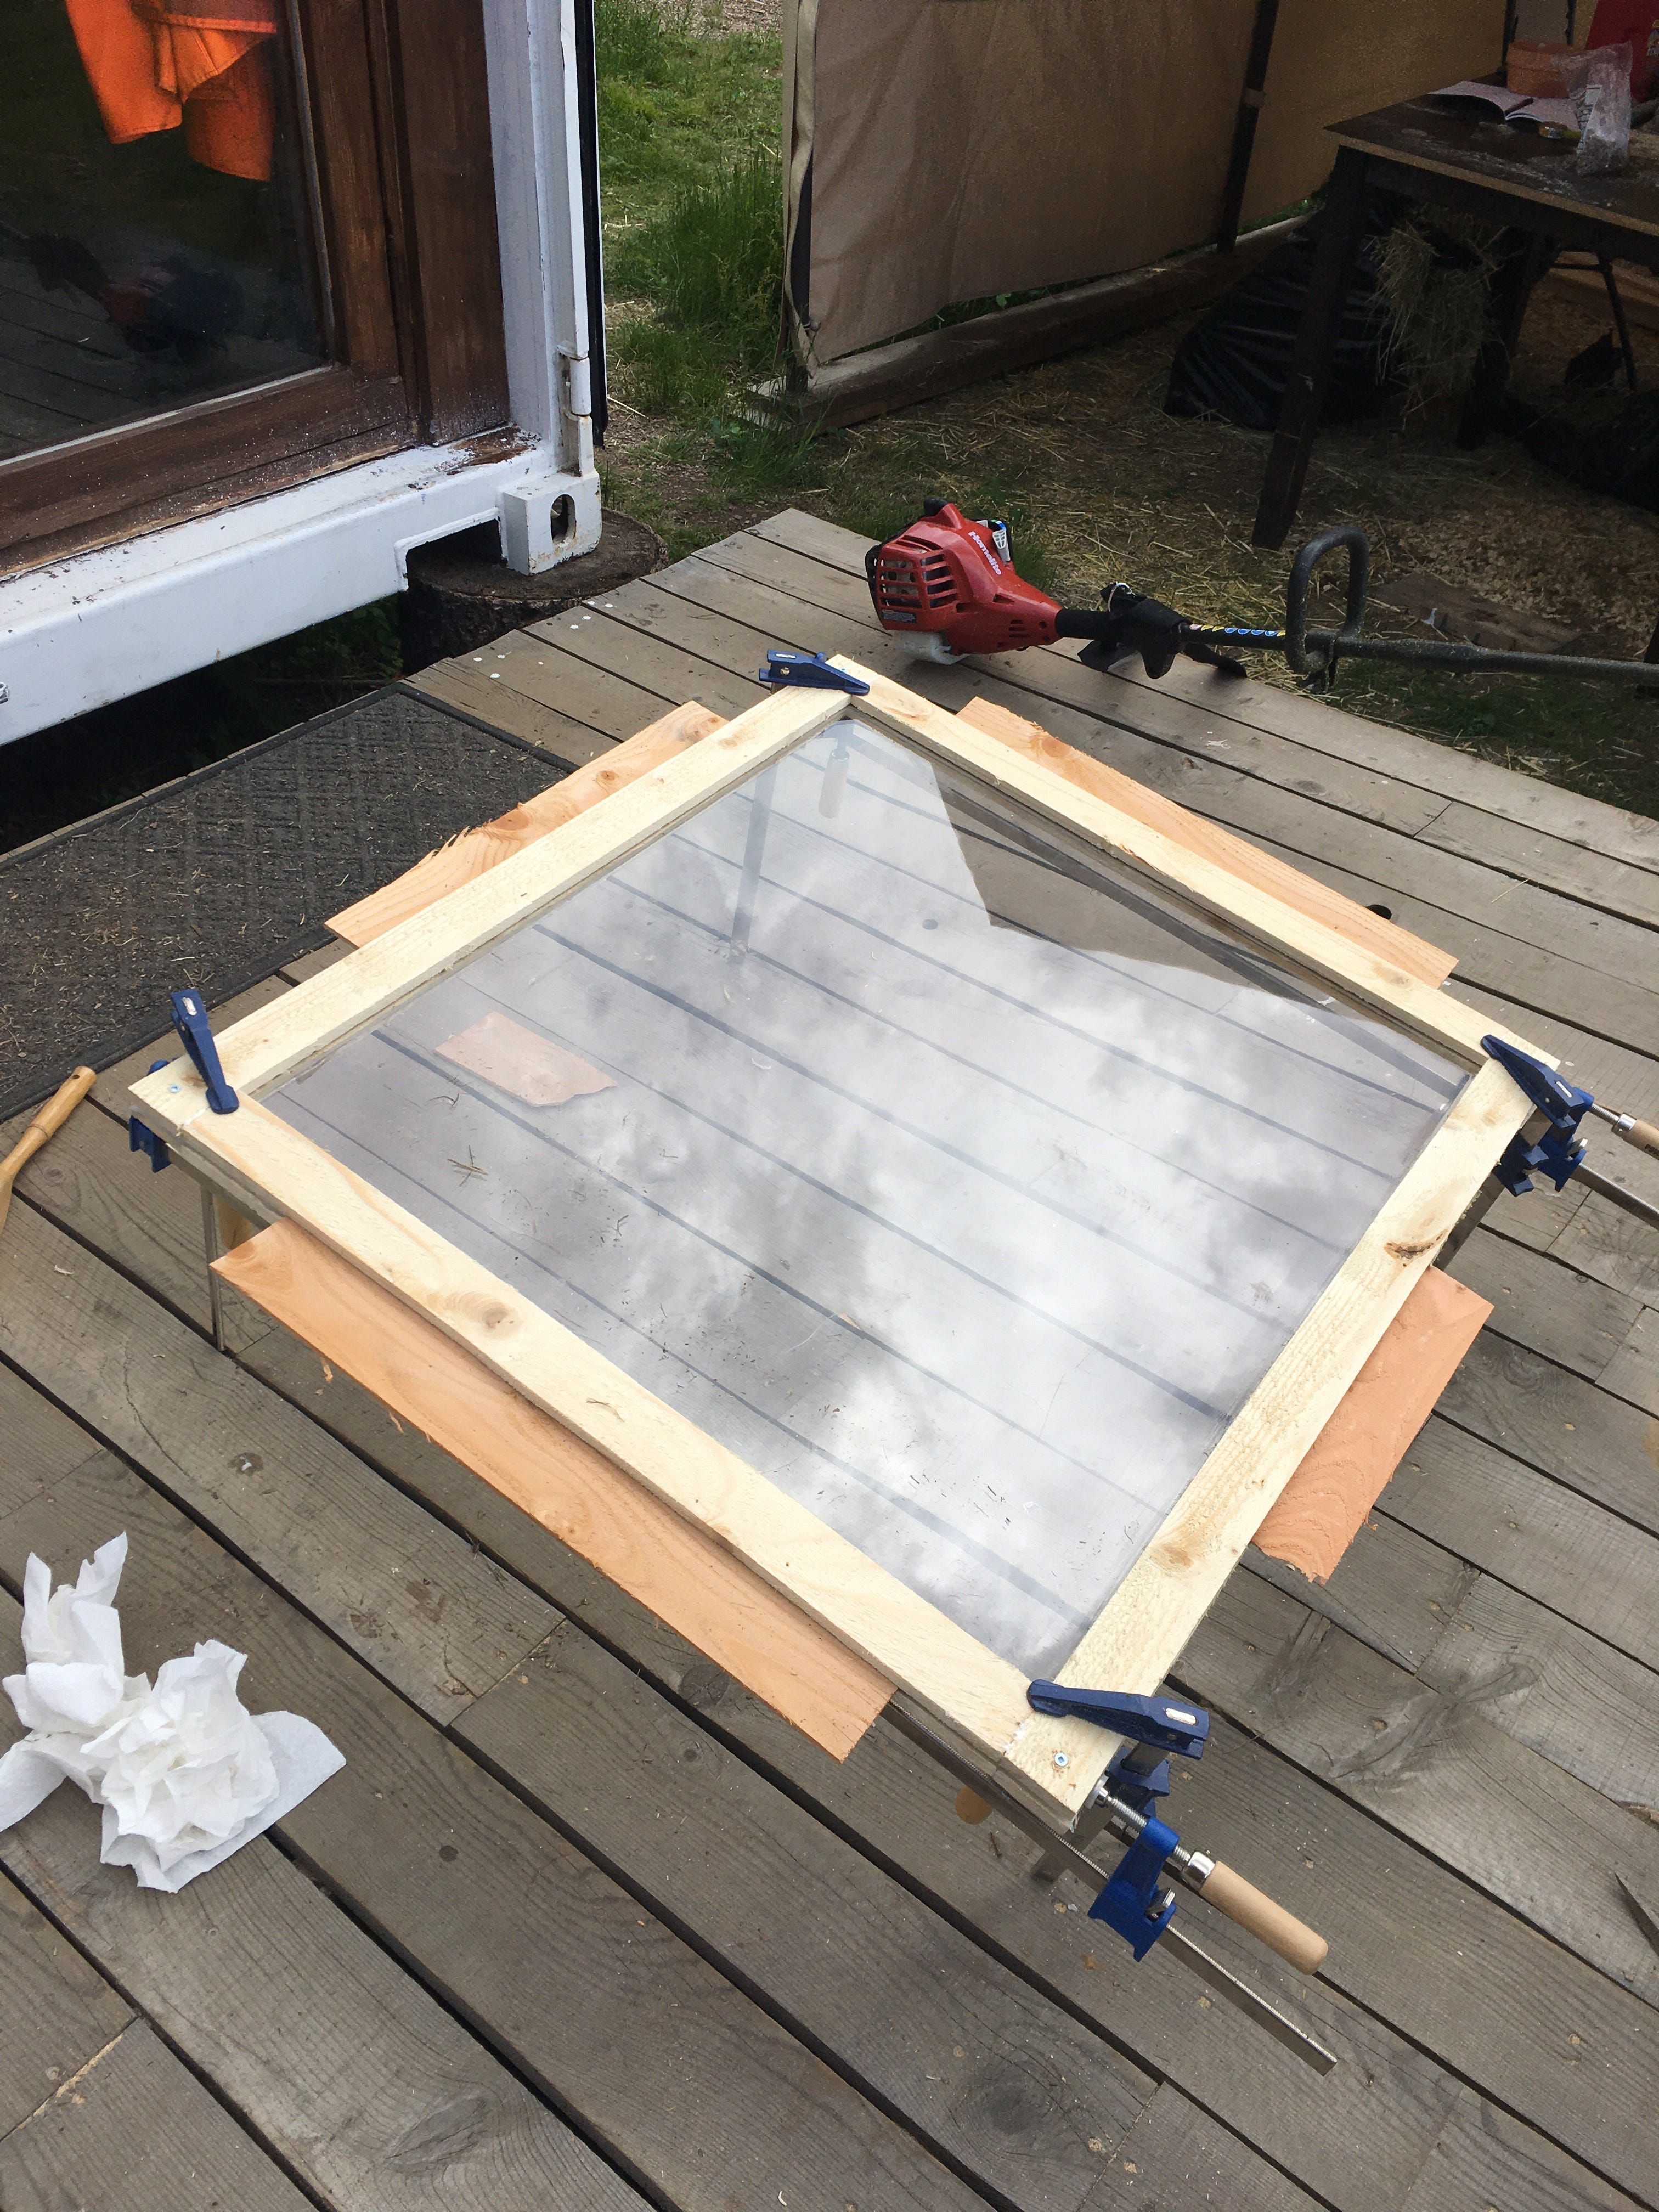
The cherry halves strewn across my truck made me want to build a solar dehydrator. Something to help preserve food, that the mice couldn’t get into. I’d known about such things for a while and wanted to find out if they actually work. From the junk pile came a piece of plexiglass and stainless steel hardware cloth. The wood was left over from building rabbit tractors. Utilizing odd-sized materials made making it into a congruent ‘thing’ tricky - but fun.

How-to
Most of my projects are this way. I can tell you what I did, why I did it and how you can too, but I can’t give you a list of materials or a specific DIY. I find projects to be more challenging, fun, and rewarding when you have to figure it out using odd materials.
The Concept
It’s a pretty straightforward design. The plexiglass allows the sun to heat up the inside of the box, like mom’s truck on a sunny day. Using black inside the box to soak up the sun is common but I opted for tin foil. Vents in the top and bottom allow for airflow and moisture to leave the box. Since I wanted to see just how hot I could get this dehydrator, my venting is very minimal.
Here are a few aspects that I knew it would need;
Glass
Reflective surface
Racks
Airflow
Vermin-proof
The Build
The best way to access the inside of my dehydrator was by hinging the glass side and making it into the door. I then made the box frame and attached the side panels.
I lined the inside with tin foil using a staple gun to attach the foil.
My next step was giving it legs that would give it an ideal slope to face the sun. I attached 2X4s for the legs. In the future, I’d like to make the legs adjustable to follow the changing angle of the sun.
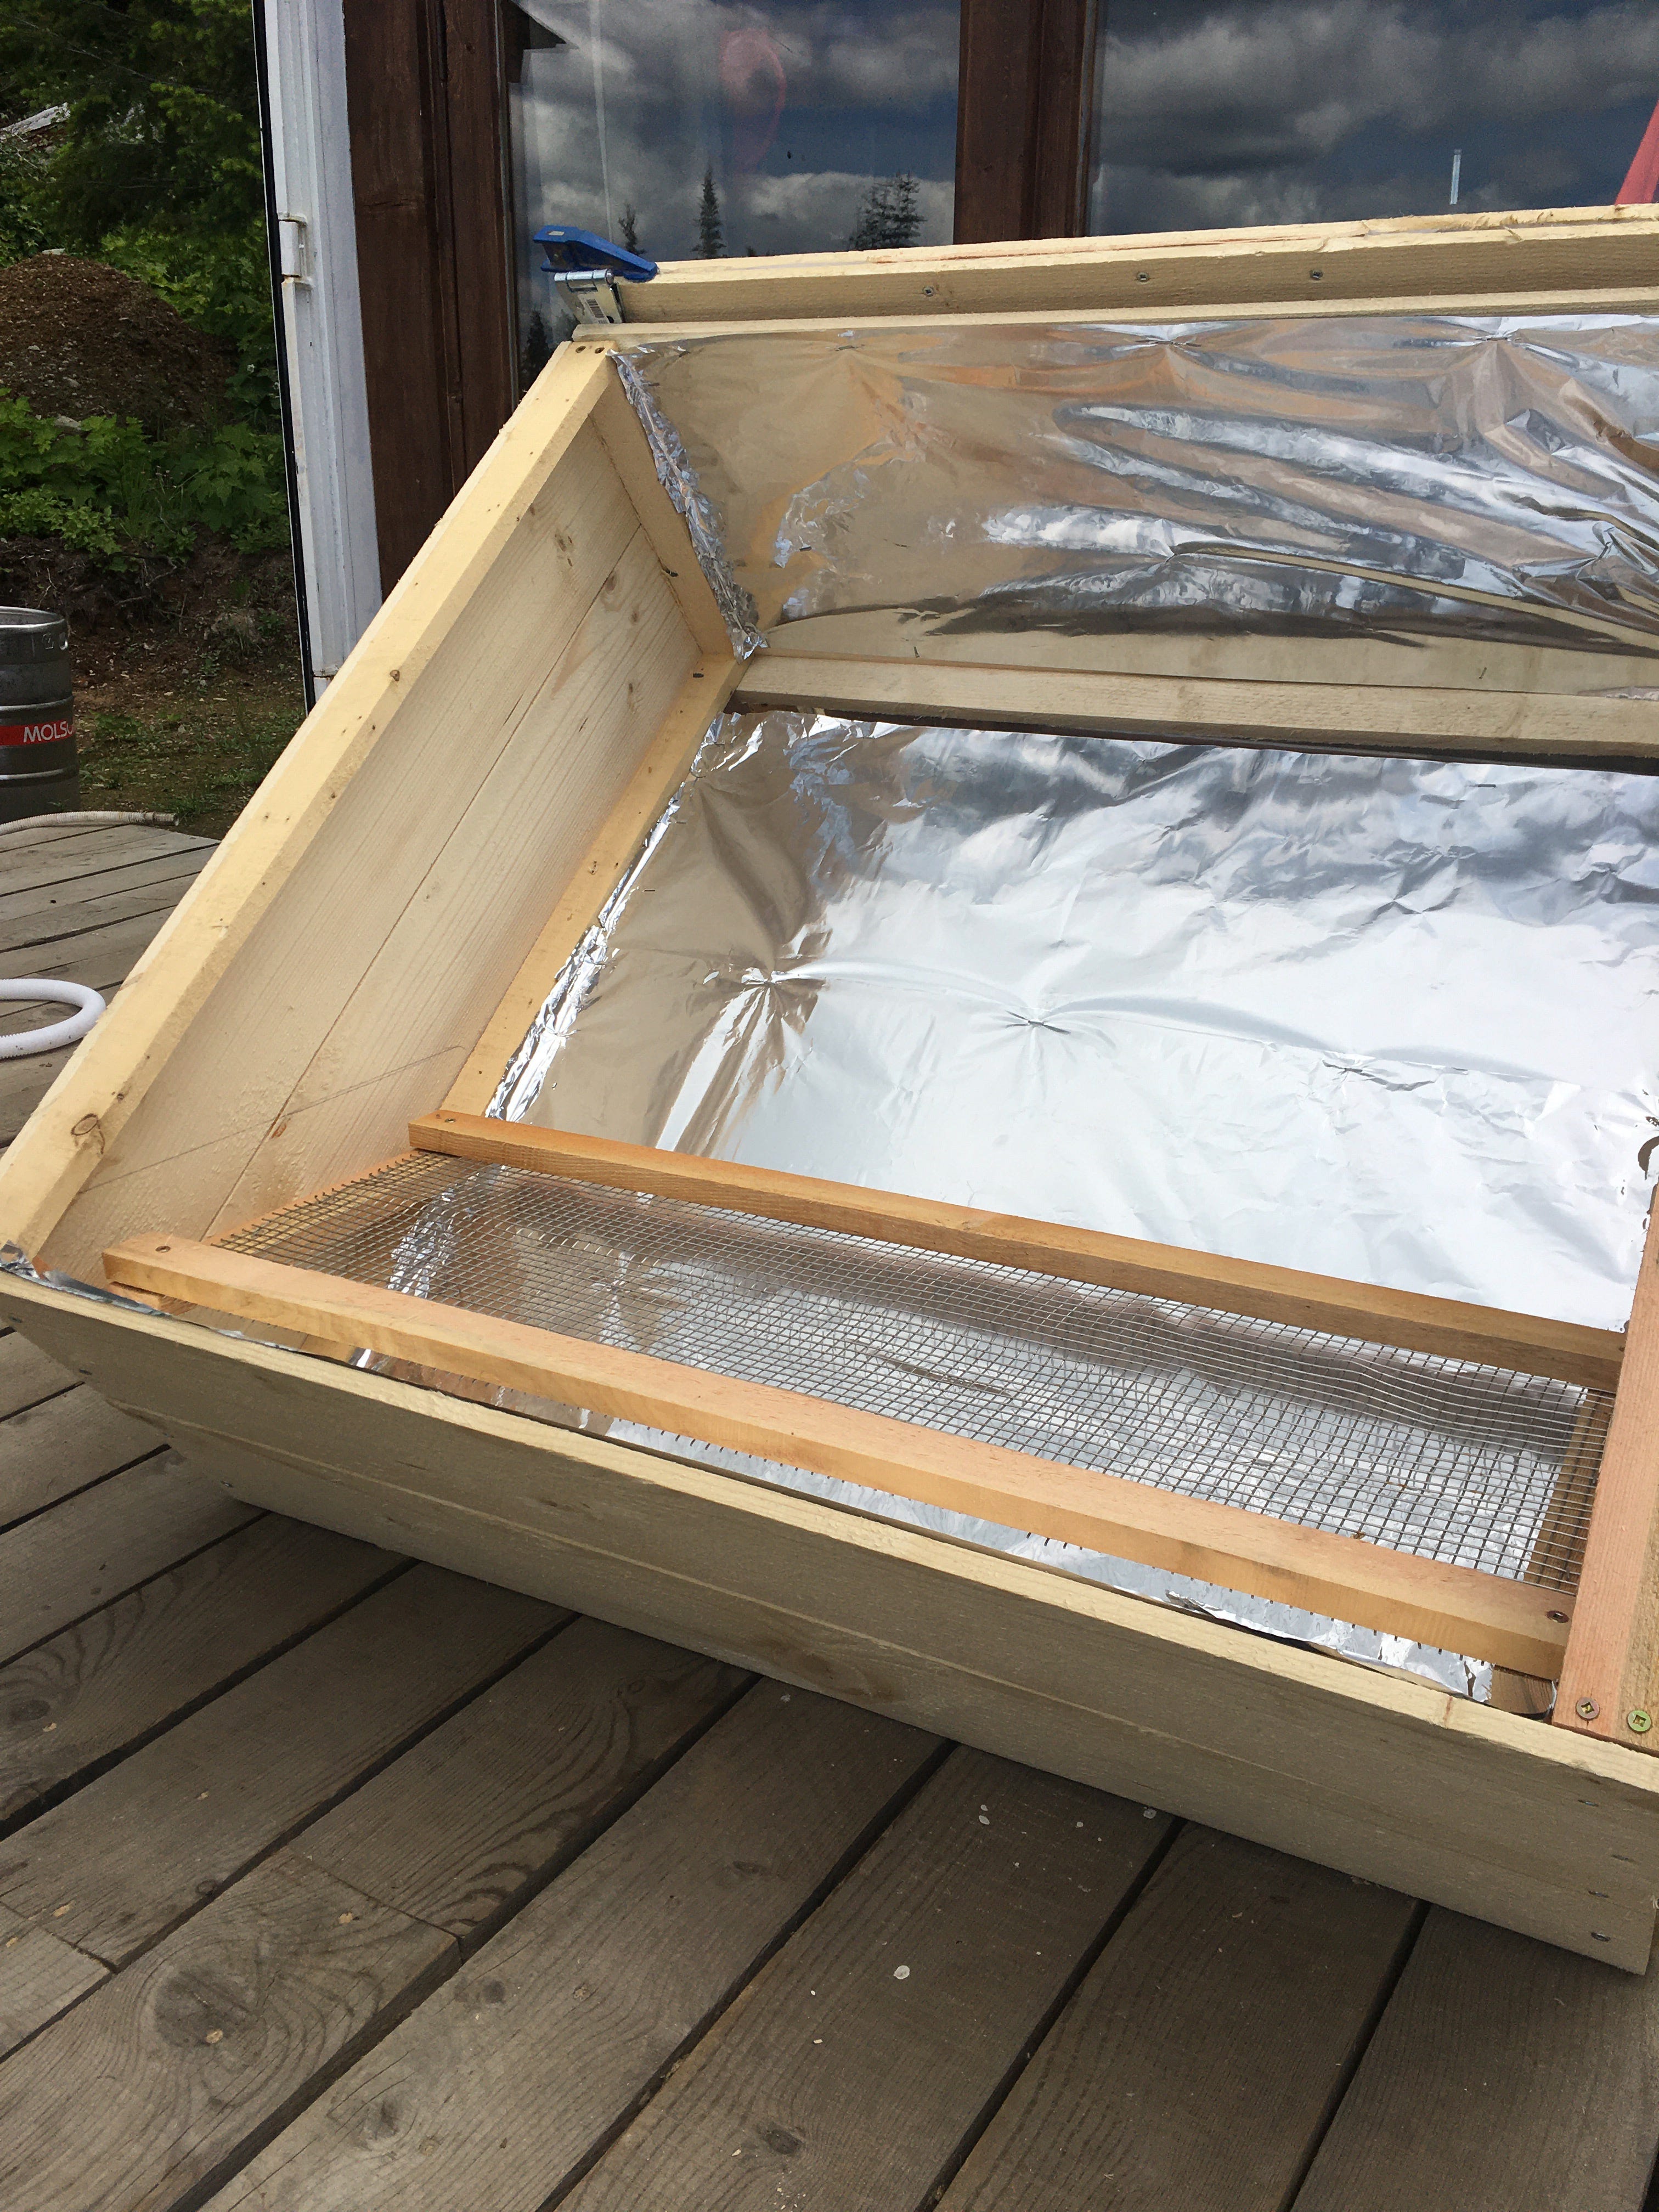
Next came the racks and ledges for them to sit on. I used a level to mark where they would be and could then tell how deep they could be. I’m not particularly good at math, so instead of trying to figure out the trigonometry of things like this, I prefer to just measure. I cut the stainless hardware cloth to size and made basic frames to attach it to.
The Turnout
Expectations were low, but hopes were high.
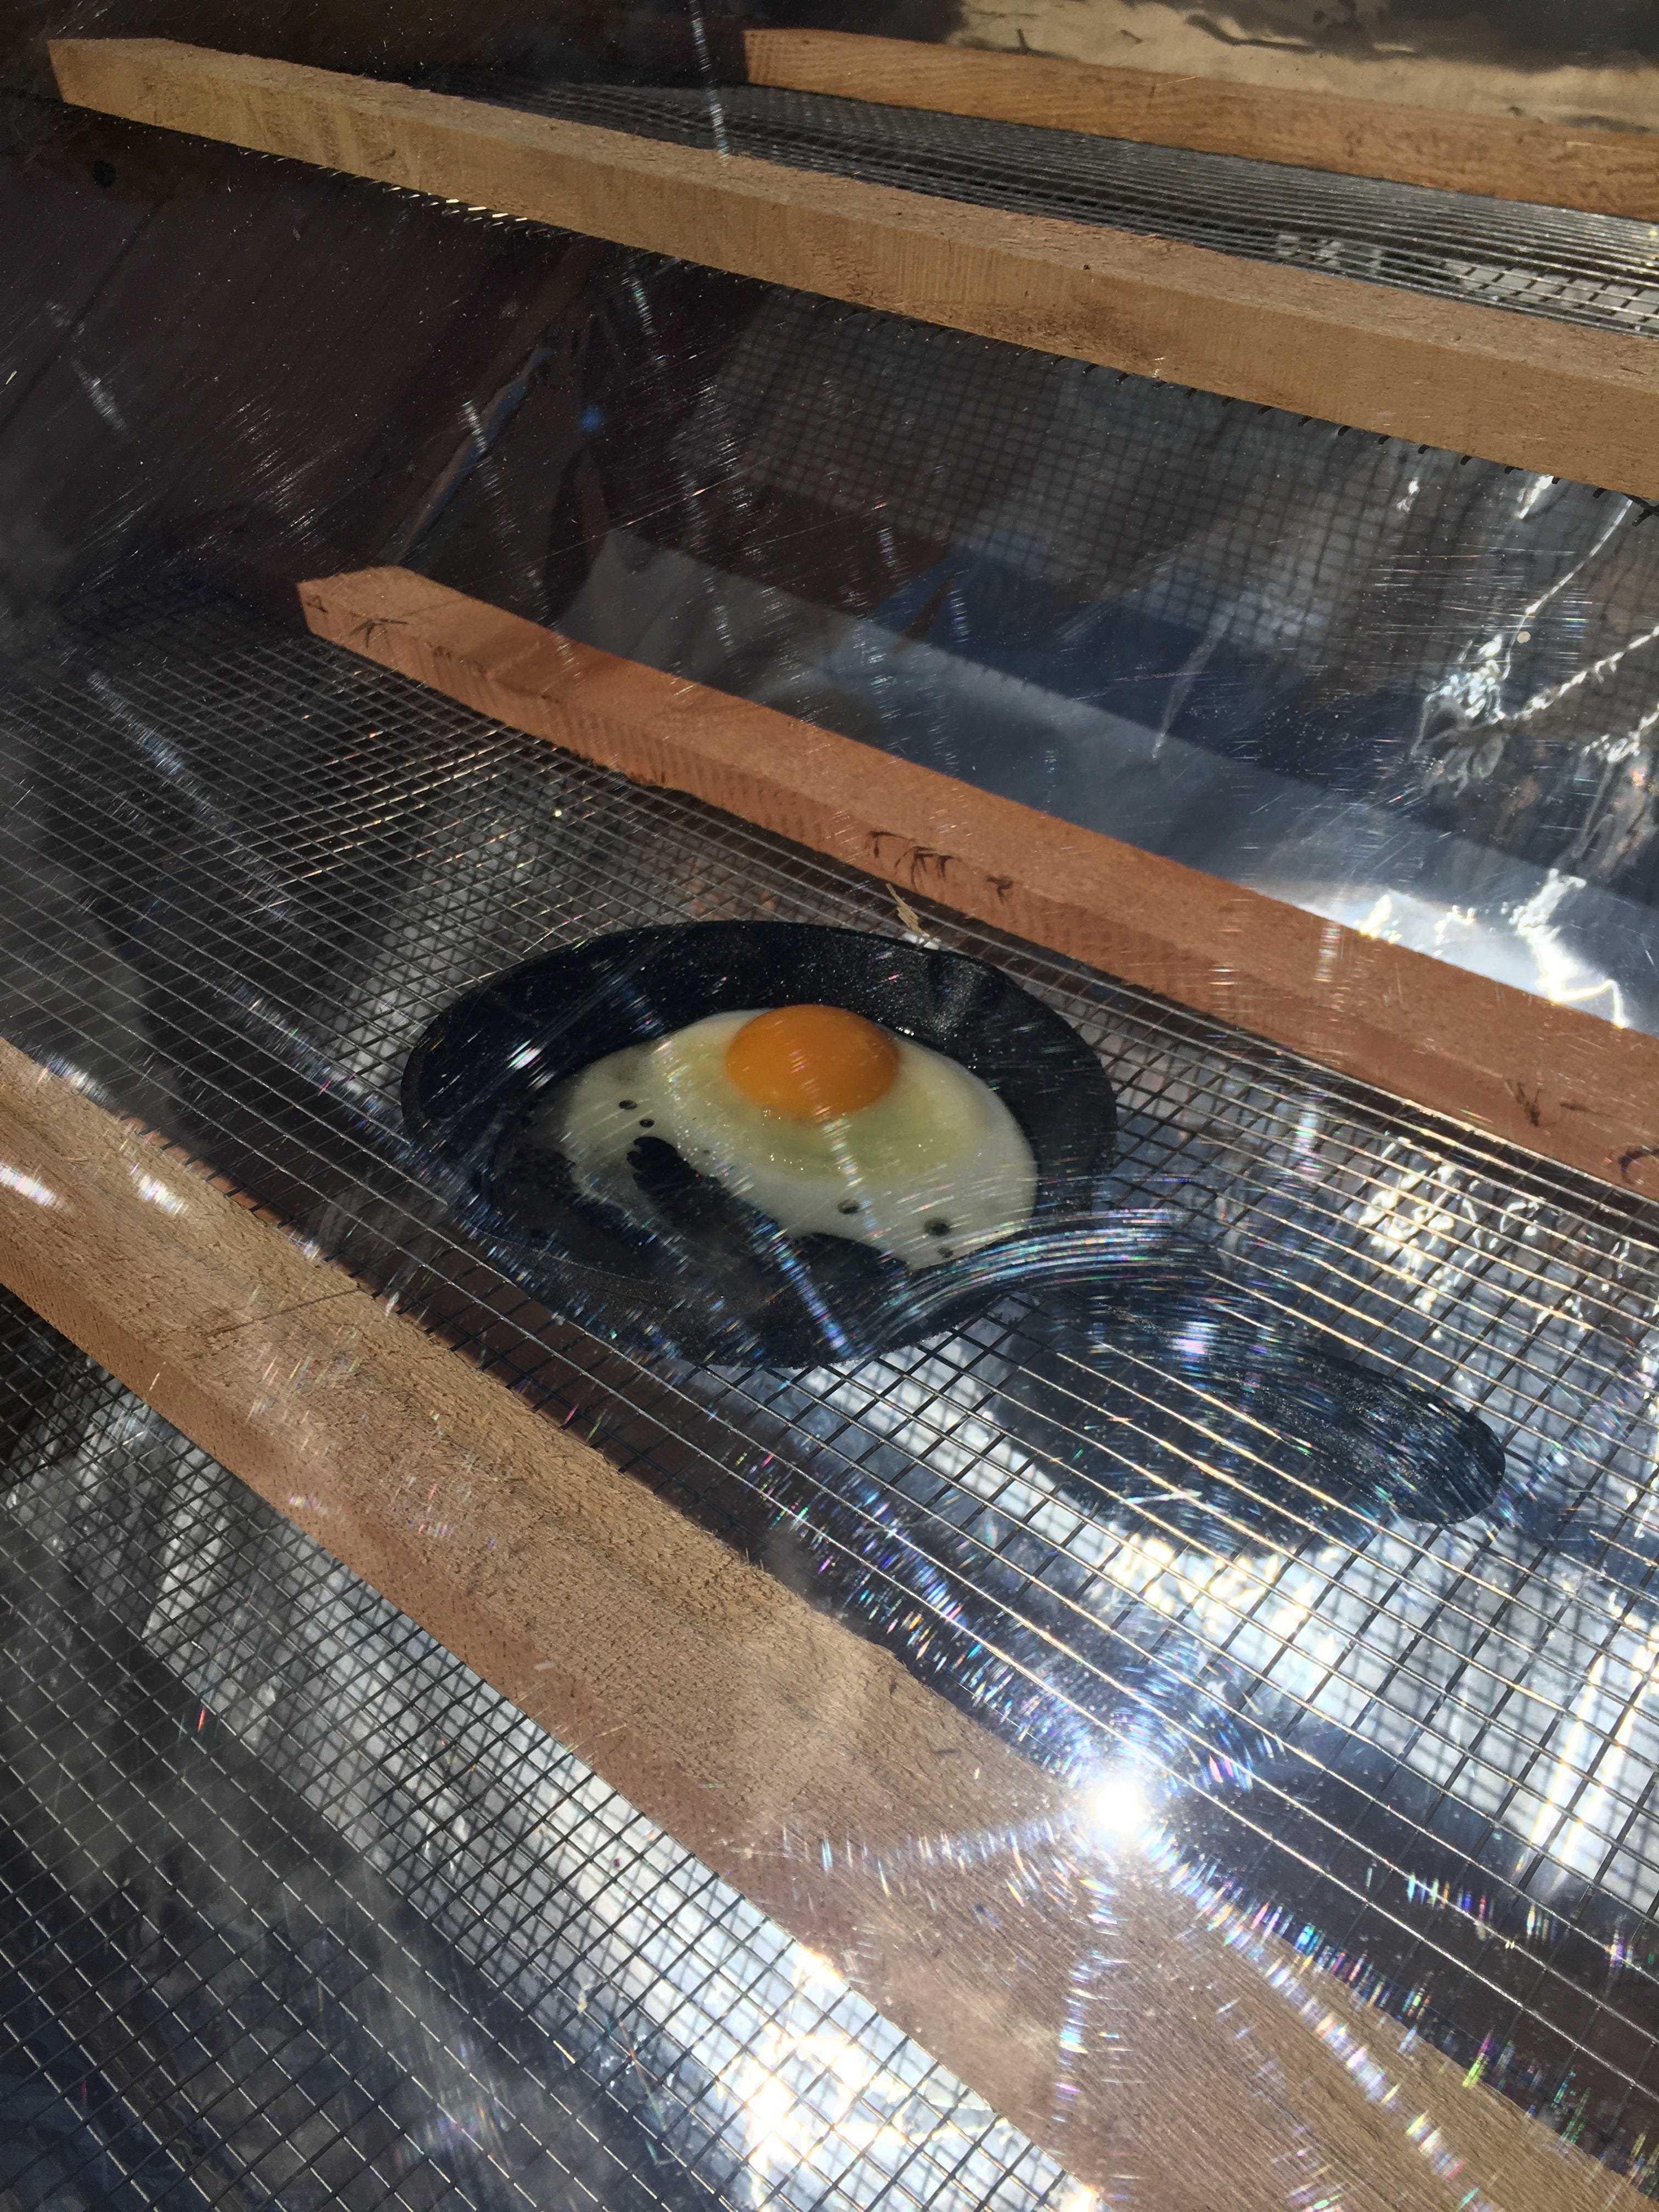
I put a digital thermometer into my creation and closed the glass door. I turned it toward the sun and sat down with a beer to watch the temperature climb. This particular thermometer takes a couple of minutes to update. I saw the temperature jump up once - then the thermometer died. I nuked it in my new contraption! Oops.
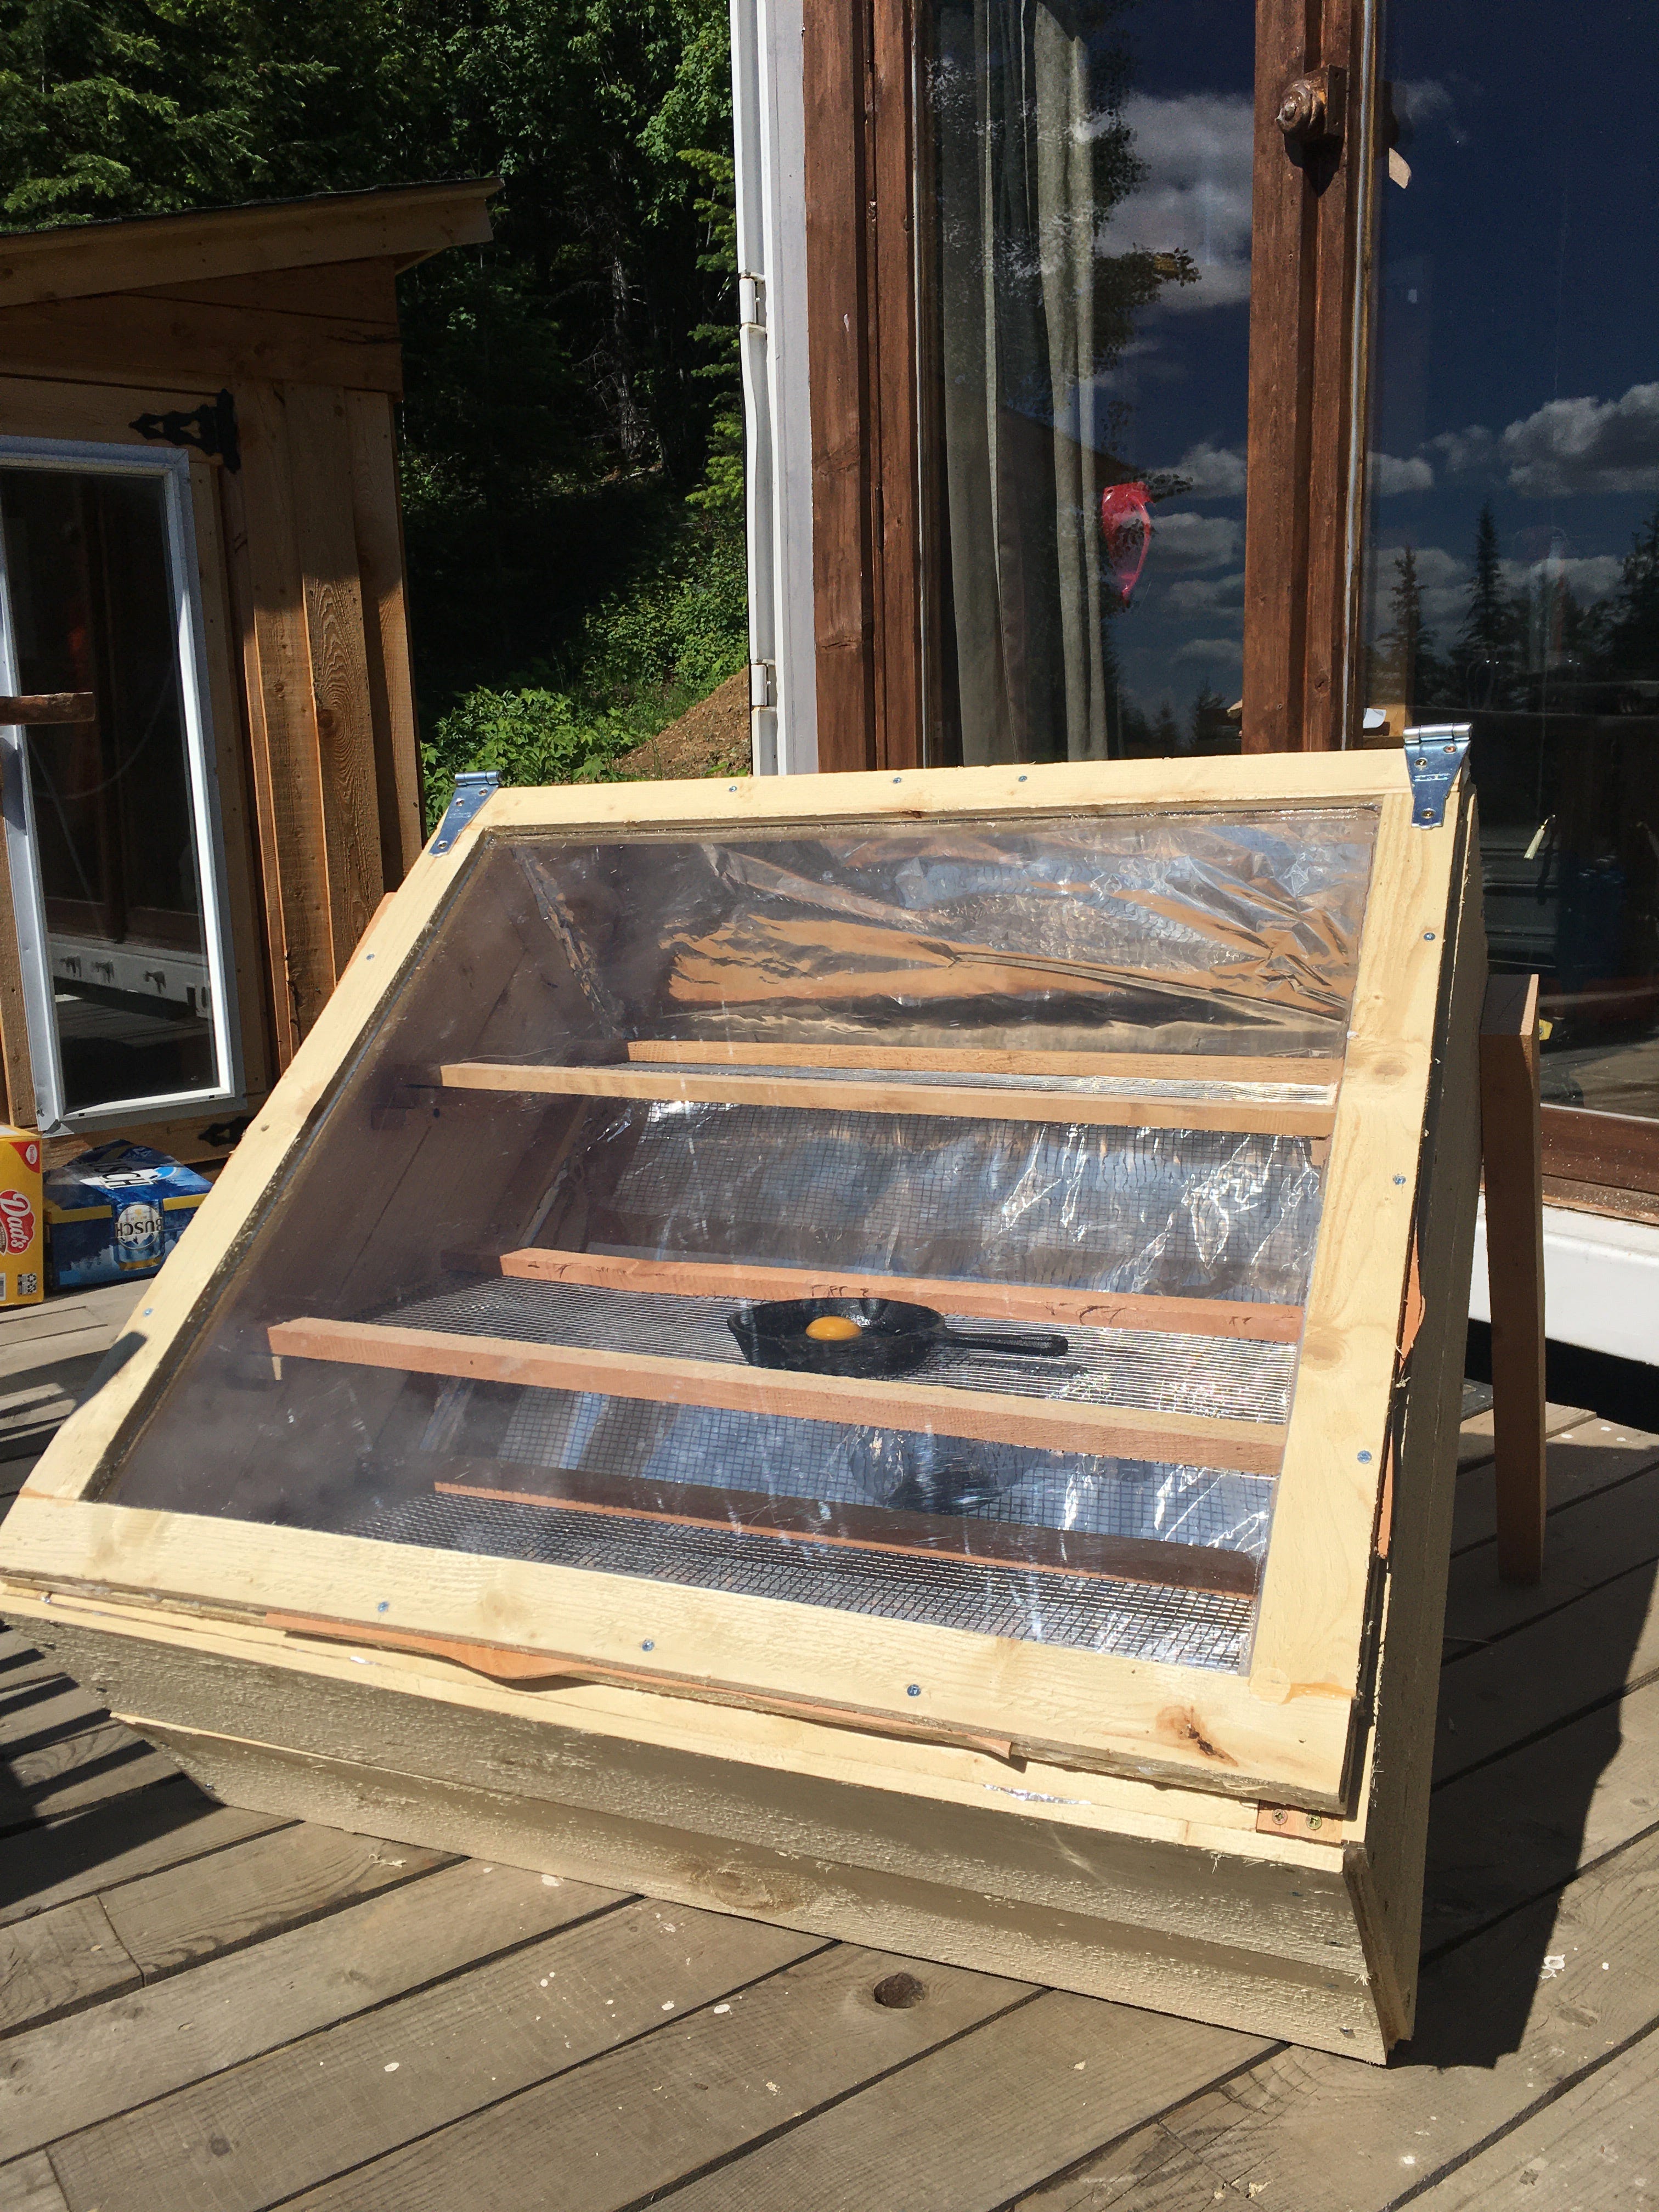
Now that I learned it gets too hot for a digital thermometer, time for the real test. I left a lightly oiled cast iron pan in the dehydrator for a few minutes. Then, I cracked an egg into it. Instantly the edges of the egg turned white and curled. OMG, did I actually make a SOLAR OVEN?! At that moment a cloud covers the sun, slowing the egg’s progress. After a very patient half hour, I had a successfully solar-fried egg!
Solar Dehydrator/Solar Oven
This isn’t the prettiest solar oven or the best-made. But my goodness, it WORKS. When I set out to make this dehydrator I kept my expectations low. Using leftover materials and things that were sitting around, I made not only a dehydrator but also an oven! I’ve since dried a wide array of things-from plums and cherries, to rabbit bones. All without the use of any electricity or fossil fuels.
I love when experiments/projects are a success!

Looks awesome , it'll be fun experimenting ! When we did kale chips in the red car we called them " Kardash kale chips " you're rockin it now !
Well done!
You can start doing sundried tomatoes yourself! dehydrating wild mushrooms for soups later, and all kinds of other cool stuff. How hot does it get in there? Maybe mount a cheap BBQ temperature gauge on it?